
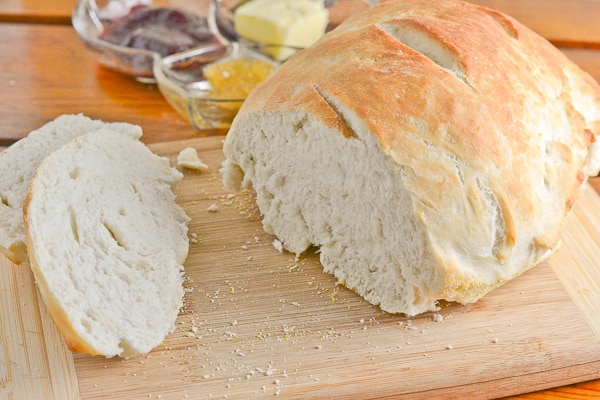
The first time my youngest son made this bread, it only lasted for two days. The recipe produced two loaves and we almost finished a whole loaf as soon as it came out of the oven. We had it simply with butter and it was delicious, especially the crunchy edges. It was so simple to make; it had only few ingredients. The hard part was kneading the dough and waiting for it to rise. It was worth the wait because we were rewarded with two loaves of bread that smelled and tasted good. We had the left-overs the next day for breakfast. We toasted it and had it with butter, jam and sunny side up egg. Our family love it so much; my son made it again this weekend. Enjoy!
Cooking Tips for Perfect Bread
Getting the texture and flavor just right can be tricky, but a few tips can help. First, make sure your ingredients are fresh. Yeast that is past its prime can lead to flat bread. If you’re unsure, do a quick test by mixing a bit of yeast with warm water and sugar. If it bubbles within ten minutes, you’re good to go. Second, knead the dough well. This develops the gluten, which gives the bread its structure. Aim for about 10 minutes of kneading until the dough is smooth and elastic. Lastly, don’t rush the rising times. Letting the dough rise in a warm, draft-free spot allows the yeast to work its magic, resulting in a light and fluffy loaf.
Serving Suggestions and Variations
Homemade bread is versatile and can be enjoyed in many ways. For a simple snack, slice it thick and serve with your favorite cheese and some fresh fruit. If you’re looking for a heartier option, try making sandwiches. This bread pairs wonderfully with roasted turkey, avocado, or even a classic BLT. For variations, consider adding herbs or spices to the dough. A tablespoon of dried rosemary or a teaspoon of garlic powder can elevate the flavor. If you want a sweeter twist, fold in some cinnamon and sugar for a delightful breakfast treat. Experimenting with add-ins can make each baking session a new adventure.
Frequently Asked Questions
What can I substitute for active dry yeast?
You can use instant yeast in place of active dry yeast. Just use the same amount, but there’s no need to proof it in water first, which makes it a bit easier.
How should I store leftover bread?
Wrap the bread in plastic wrap or foil and keep it at room temperature for up to three days. For longer storage, slice it and freeze it, so you can take out just what you need later.
Can I make this bread ahead of time?
Absolutely, you can prepare the dough and let it rise in the fridge overnight. Just bring it back to room temperature and let it rise again before baking.
What are some good toppings for this bread?
This bread is great with butter and jam, but you can also try it with avocado, garlic herb spread, or even use it for sandwiches. Get creative with your favorite toppings.
What mistakes should I avoid when making bread?
One common mistake is not kneading the dough enough, which can lead to dense bread. Also, make sure your water is warm but not too hot, as that can kill the yeast.

Easiest Homemade Bread
Ingredients
- 1 tbsp active dry yeast
- 1 tbsp sugar
- 1 tbsp salt
- 2 cups warm water not over 110°F
- 5 1/2 cups all purpose flour plus more for kneading
- cornmeal
- boiling water
Instructions
- Mix together the first four ingredients. Let this stand until the yeast, sugar and salt are dissolved. Gradually add the flour to the liquid and mix thoroughly until the dough pulls away from the sides of the bowl. Turn the dough out onto a floured surface to knead. (This may be a little messy, but don't give up!)
- Fold the far edge of the dough back over on itself towards you. Press into the dough with the heels of your hands and push away. After each push, rotate the dough 90°. Repeat this process in a rhythmic, rocking motion for 5 minutes, sprinkling only enough flour on your kneading surface to prevent sticking. Let the dough rest while you scrape out and grease the mixing bowl. Knead the dough again for 2 to 3 minutes.
- Return the dough to the bowl and turn it over once to grease the top. Cover with a damp towel and keep warm until the dough doubles in bulk, about 1 to 2 hours.
- Punch down the dough with your fist and briefly knead out any air bubbles. Cut the dough in half and shape into two Italian- or French-style loaves. Place the loaves on a cookie sheet generously sprinkled with cornmeal. Let the loaves rest for 5 minutes.
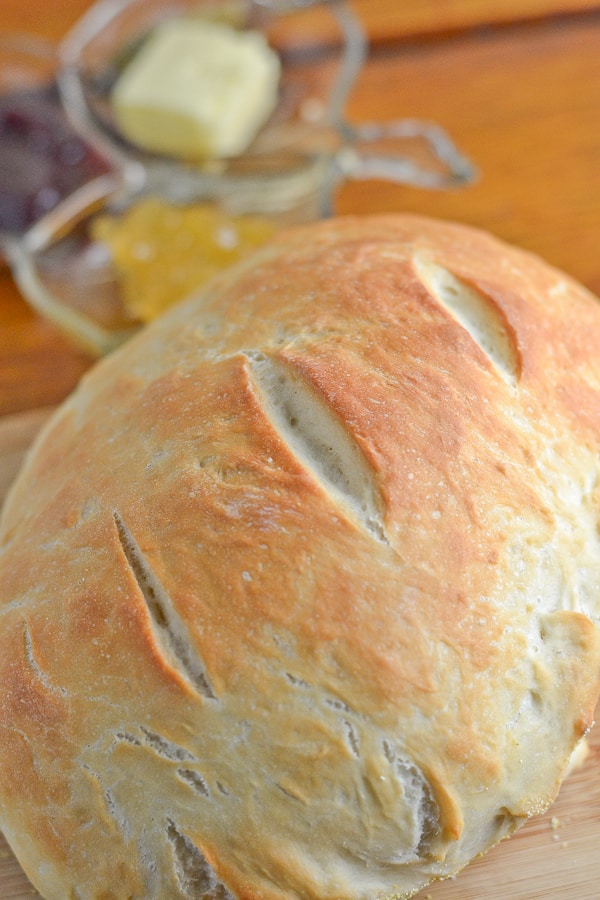
- Lightly slash the tops of the loaves 3 or more times diagonally and brush them with cold water. Place on rack in a cold oven with a roasting pan full of boiling water on the oven bottom. Bake at 400°F for 35 to 45 minutes, until the crust is golden brown and sounds hollow to the touch.
Notes
Nutrition
Leave a Reply