

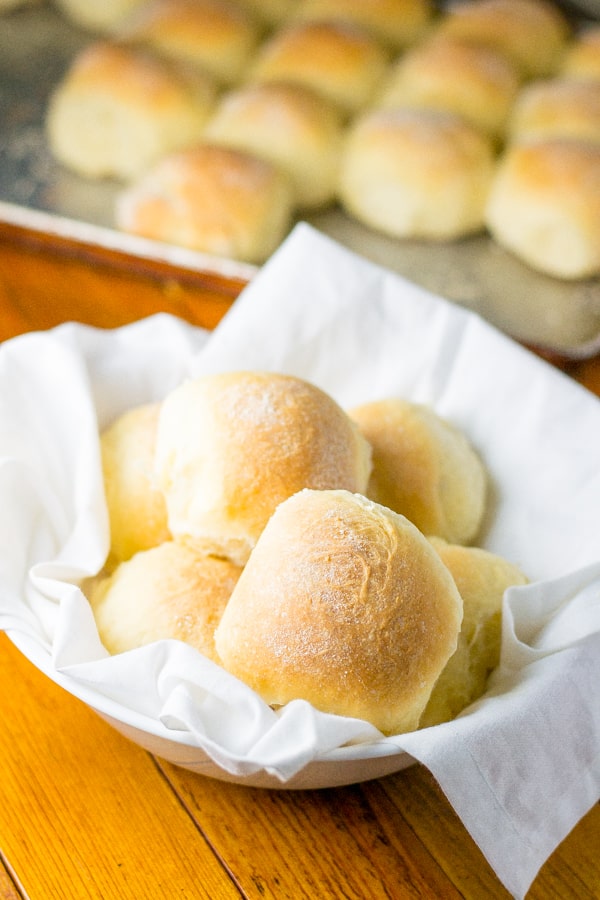
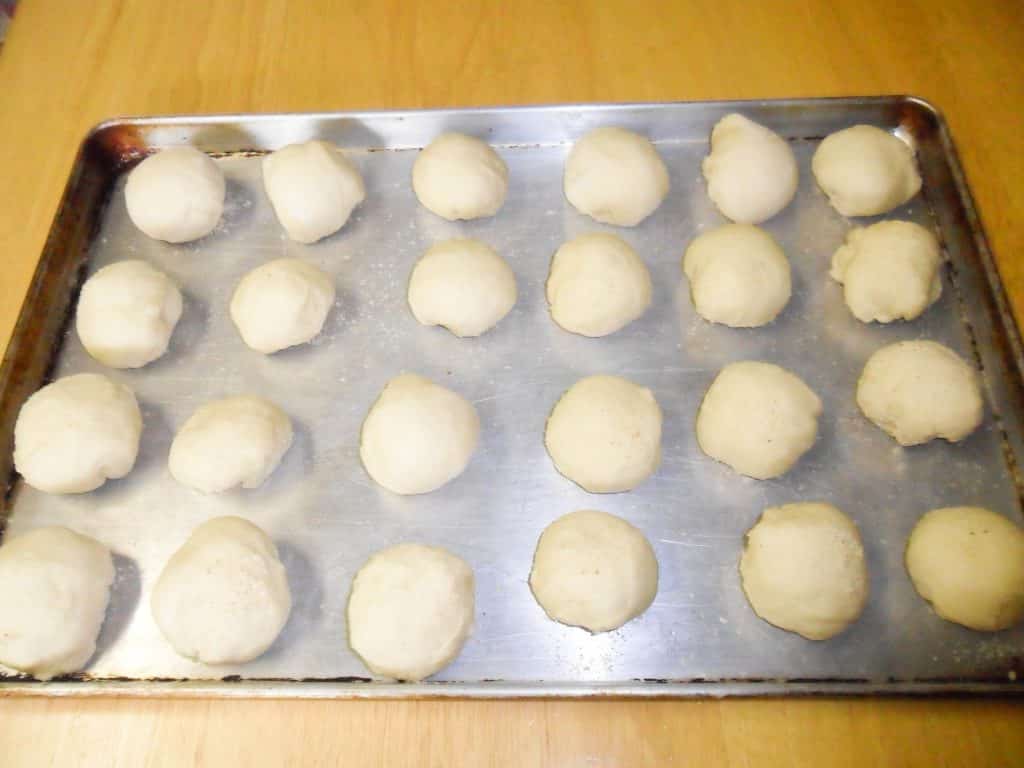
Letting the pan de sal rise
Cooking Tips for Perfect Pan de Sal
To achieve the best texture and flavor in your pan de sal, pay close attention to the temperature of your ingredients. Using room temperature milk and eggs helps activate the yeast more effectively. If the milk is too cold, it can slow down the yeast activity. Make sure to proof your yeast before adding it to the mix. This way, you can be sure it’s alive and ready to help your dough rise. Another important tip is kneading. Even though a bread machine does most of the work, check the dough halfway through the kneading cycle. If it seems too sticky, add a bit more flour, a tablespoon at a time. After you shape the rolls, let them rise in a warm spot. Cover them with a clean kitchen towel to prevent the surface from drying out. An oven with the light on works great for this. Patience is key, so don’t rush the rising process. The longer the rolls rise, the fluffier and more flavorful they will be.
Serving Suggestions and Pairings
Pan de sal is incredibly versatile, making it a fantastic addition to any meal. For breakfast, serve them warm with butter and a sprinkle of sugar for a nostalgic treat. If you want something heartier, slice them open and fill them with scrambled eggs and your choice of protein, like longganisa or tocino. For lunch or a snack, they pair wonderfully with savory spreads like liver pâté or cheese. You can even make mini sandwiches with your favorite deli meats or veggies. If you have leftovers, don’t worry. They also make a great base for a sweet dessert. Try slicing them in half and toasting them lightly, then adding a layer of your favorite jam or a drizzle of honey. For a unique twist, fill them with ice cream for a delightful dessert. Whatever you choose, pan de sal brings a comforting, homemade touch to every meal.
Frequently Asked Questions
What can I substitute for milk in this recipe?
If you’re out of milk, using almond milk or soy milk works just fine. Just make sure they’re lukewarm to keep that yeast happy.
How should I store leftover pan de sal?
Store any leftover pan de sal in an airtight container at room temperature for up to two days. For longer storage, you can freeze them and just pop them in the toaster when you’re ready to enjoy.
Can I make pan de sal ahead of time?
Absolutely, you can prepare the dough the night before and let it rise in the fridge. Just take it out the next day, shape it, and let it rise again before baking.
What do I serve with pan de sal?
Pan de sal pairs wonderfully with a variety of spreads like butter, jam, or peanut butter. It also goes great alongside savory dishes like corned beef or eggs for breakfast.
What should I do if my dough isn’t rising?
If your dough isn’t rising, it might be due to cold ingredients or inactive yeast. Make sure your milk and eggs are at room temperature and check that your yeast is fresh and properly proofed before mixing.

Pan de Sal (Filipino Bread Roll)
Ingredients
- 1 cup lukewarm milk
- 2 tablespoons butter
- ½ cup sugar
- 1 teaspoon salt
- 2 eggs
- 4 cups all purpose flour
- 2 ¼ teaspoons bread machine yeast
- Breadcrumbs
Instructions
- In the pan of the bread machine, add ingredients in the order listed above, starting with the milk and finishing off with the yeast.
- Select bread type setting to dough/pasta to make the dough.
- When the cycle is complete (2 hours), transfer dough into a lightly floured surface.
- Divide dough into 24 pieces. Shape each piece into a ball, roll in breadcrumbs and place in a baking pan.
- Cover with a cloth and let rise for at least one hour or until almost double in size.
- Bake in 225°F oven for 20 minutes and then increase the oven temperature to 325 degrees. Bake for another 10-15 minutes or until golden brown. Serve and enjoy!
Thank you, Liza for this pandesal recipe bread machine version. By far the best recipe I’ve tried! I made corned beef pandesal using your recipe and it turned out so good! I used it again to make adobo pandesal but this time using a combo of bread & AP flour. Taste and softness is the same but the batch made with bread flour came out more chewy with a “fuller” or “heavier” texture vs airy & pillowy. I keep them in the freezer and would just heat up in the toaster oven. So yummy even after a couple of days. Thank you again!
You are welcome Blanca! I am so glad you were able to try my pan de sal bread machine recipe and had success with it. Take care and thanks for writing!
Hi Lisa. Thanks for the bread machine pandesal recipe. By far this is the best recipe. Tried it three times which came out perfect because of the sizing. Now I was able ti cut it inti 24 pcs. Again I thank you fir sharing your recipe. Stay safe and GOD BLESS!
You are welcome Lorna! I am so glad you are enjoying this pan de sal recipe. Take care and stay safe too!
Hi Liza
Saw your recipe being credited on one of the pandesal videos on you tube. So, I thought I’d go straight to the source!
Quick question: Is Saf Instant yeast the same as the bread machine yeast? If so, I don’t have to let it rise?
Hi Lorelei,
I am not familiar with saf-instant yeast but I’ve found a good site that explains it. Here’s the link: https://adamantkitchen.com/bread-machine-white-bread/. Hope this helps!
Hi Liza,
Thank you so much for your recipe. My pandesal was fluffy and soft on my first time, however, the dough was so sticky I had to scrape it off. What could be the problem? I used bread flour and also I shaped the dough right after it’s done kneading from the bread machine. Thank you.
Hi Melanie,
If your dough turns out too sticky, try adding a bit of flour at a time. Make sure not to add too much flour though. I find sticky dough (not too sticky) produces soft and fluffy pan de sal.
first time baking pandesal and this recipe taste like home, thank you so much.
You are welcome 🙂
Question: Can I freeze the dough? It’s just me, my husband doesn’t eat bread. I would like to be able to bake the quantity I like at any time. Thank you.
PS: I made this recipe before and it is quite tasty and delicious, I gave some away to my colleages and they absolutely loved it!
Yes, you can freeze the dough. Wrap the dough tightly with plastic wrap before storing in the freezer. When you are ready to use the dough, defrost and then continue with step 4. Hope these help!
It is my first time to make pandesal. And among the recipes in the internet, this the the BEST!
Pandesal came out light, soft and delicious.
Thank you po sa recipe!
That’s awesome! So glad you were able to try this pan de sal recipe and had success with it 🙂 Take care and stay safe!
Hi. Thanks for the recipe.. just wanted to ask you regarding the oven.. do we need to preheat the oven to the set temp first before popping in the dough? My first attempt came up a bit hard.. will give it another try. But the taste is good.
Hi Andrew,
Yes, bake the ball-shaped dough in the preheated 225 degrees F oven for 20 minutes and then increase the temperature to 325 degree F. Bake the rolls for another 10 minutes or until golden brown. Hope these help!
Hi Liza, another question, my machine increasing dough setting is only for 1.5 hours.. do I have to wait another half hour before taking it out of the pan? And once I get out out do I still need to knead it or just directly divide into the smaller pieces..? I am afraid that I’m additional kneading is making it tougher.. any clarification will help..
Hi Andrew,
After 1.5 hours, I would wait for another half an hour before opening the bread machine and removing the dough from the pan. This step will give the dough extra time to rise. Next step is to immediately divide the dough into smaller pieces. Yes, additional kneading will make the pan de sal tougher.
Dear Liza, Your pandesal recipe is just perfect. Can you also do siopao recipe using bread machine for making dough?
Hi,
I don’t think this pan de sal recipe can be used to make siopao.
I looked at your ingredients and in one of your comments you’ve mentioned that if you use instant yeast you only use 1 3/4 teaspoons. However looking at your bread machine recipe you still use 2 1/4 teaspoons of bred machine yeast. I thought they bread machine yeast is the same as instant yeast.
Hi Dawn,
Yes bread machine yeast is the same as instant yeast. As for the conversion from active dry to instant yeast, the rule of thumb is.. “if a recipe calls for 2 1/4 teaspoons of active dry yeast, use 1 3/4 teaspoons of instant dry yeast”. I have been using 2 1/4 teaspoons bread machine yeast for my pan de sal bread machine recipe ever since and my pan de sal always turn out great.. soft and fluffy. So feel free to try and experiment.
I’ve tried baking pandesal and they are really good so now, I thought of making siopao.
Can I make siopao dough with this pandesal recipe; steam instead of baked?
I don’t think this pan de sal recipe can be used to make siopao.
I just want to say thank you for this delicious recipe of yours. I get to see my grown up daughters almost everyday as they can’t get enough of these bad boys.
can I open the machine while the process is going on just to scrape the flour around it?
It should be okay to open the lid of the bread machine while it’s mixing the dough.
hi
i made this and it was yummy … question… when i switch the temperature do i leave the bread in the oven while it goes up in temp or take it out? i ask because it takes about 4 minutes to heat it … and will it be now additional 6 minutes or another 10 minutes once temperature went up
also … the bottom became hard but top is fluffy … how do I fix this?
Thanks
Hi Sigh,
Leave the pan de sal in the oven when you increase the temperature from 225 degree F to 325 degree F. As for the bottom part of the pan de sal being hard, make sure to place the baking pan in the middle rack of the oven.
Hello Liza! Can bread flour be used for the bread machine recipe of your Pandesal? The instructions for my bread machine says to not use all-purpose flour.
Hi Leah,
Yes, you can use bread flour in bread machine to make pan de sal. I hope this helps!
Hi Liza,
I made the pan de sal dough late at night can I let it rise more than 5 hours and bake it? And do
I need to have bread crumbs because I don’t have it.
Yes, you can let the dough rise for more than 5 hours and bake it. Make sure you don’t over proof the dough for it will have a strong after-taste when baked. If may omit the bread crumbs, just make sure to line your baking sheet with parchment paper. Hope these help!
I made the dough late at night, can I let it rise for more than 2 hours then bake it?
Yes, you can let the dough rise for more than 2 hours (or until it doubles in size) and then bake it.
Hi, I just finished baking a batch of pan de sal using bread flour. I will bake another batch tomorrow using your recipe. Have you tried doing a combination of all purpose flour and bread flour? What would be the proper ratio for the liquids then? Your recipe also says “when cycle complete, 2 hours, transfer dough..” is this after the kneading cycle and before the 1st rise in the bread machine? Or do I leave the dough in the machine to rise, take out after 2 hours and complete the last rise shaped into balls for 5 hours? Thanks.
Hi Maya,
I have not tried combining all-purpose flour with bread flour but I have seen pan de sal recipes that do that. In step 3, it says “when the cycle is complete (2 hours), transfer the dough.. “means to remove the dough from the bread machine right after the dough cycle is done. The dough cycle depends on what brand of bread machine you have. Mine has a 2-hour dough cycle while some has 1 hour and 50 minutes. Hope these help!
Good morning!
Thanks for this recipe. Made 12 pieces instead of 24. My first pandesal…ever!
That’s awesome!
I tried this pandesal recipe with my bread maker machine. My husband loves it. And my children too. We almost finish the 24 pcs in one day.
Super thank you for this recipe .
That’s great!
Hi Liza,
Okay, I just baked and ate some pan de sol and they were perfect. Masarap!
My oven is a very basic gas one and the lowest temperature (according to my oven thermometer) it can do is about 310° F. I left the door ajar and was able to bring the temperature down to 250° F. After 18 minutes, the buns were golden brown so I checked one and it was completely cooked through. Accordingly, I removed the rest from the oven: completely omitting the 10 to 15 minutes at 325° F final phase of your instructions.
So, not only is your recipe delicious, it’s also very flexible for those of us with less-than-ideal ovens.
I served them, hot with butter, to the family and they loved them.
With the ongoing Covid-19 lockdown, I’ll be baking these pan de sol buns every day or two. Thanks for your foolproof recipe!
Hi Jimmy,
Thanks for the detailed feedback, very much appreciated. I am so glad you were able to try this recipe and made some changes to fit whatever you have. Stay safe and thanks for writing!
I only have regular yeast so I combined it with the milk and sugar and let it activate for about 15 minutes before adding the remaining ingredients. Right now I’m midway through letting the 24 dough-balls rise.
I don’t have breadcrumbs, so I rolled the dough-balls in fine cornmeal instead. They are minimally coated. I hope it turns out okay.
I’ll post again after we eat them.
Have you ever made you tube videos. I am more of a visual on trying new things.
Do you recommend using active dry yeast or instant rise yeast? I use platinum red star superior baking yeast with my pandesal recipe. I have been using a pandesal bread maker recipe but uses water and canola oil vs milk and butter, bread flour vs APF. I also dissolve the yeast with sugar in water, then add the wet ingredients and then the dry. It works really well. I saw your recipe and I liked the idea of milk and butter so I tried it. I’m currently rising my dough now and am excited to test the results.
Hi Letlet,
I normally use bread machine whenever I make pan de sal so I use the bread machine yeast. I am glad you are trying my recipe and hope it turned out well!
We do not have to activate the yeast for this one?
Hi Elvin,
We don’t need to activate the yeast when we are using the bread machine yeast to make pan de sal using a bread machine: https://salu-salo.com/pan-de-sal-filipino-bread-roll/. We do need to activate the yeast when we are making pan de sal manually: https://salu-salo.com/pan-de-sal/.
Hi Liza,
I have a few questions. Can I use olive oil as a substitute for butter? Do I have to preheat the oven to 225 degrees before putting the dough into the oven? Can I use powdered milk by itself or maybe mix the powdered milk with warm water?
Hi Ren,
Yes, you can use olive oil. I have a friend who uses olive oil to make pan de sal.Yes, you have to preheat the oven to 225 degree F before putting the dough in the oven. Finally, yes you can use powdered milk mixed with warm water. Hope these help!
Hi Liza,
I don’t have a bread machine but plan on using my stand mixer. Do I follow the recipe for the bread machine? Do I put the yeast in without needing to activate it? Thank you.
Hi Maria,
If you are using a stand mixer to make this pan de sal recipe, follow the recipe of the “pan de sal without bread machine”: https://salu-salo.com/pan-de-sal/. Hope this helps!
I need to say this: THIS IS AMAZINGLY GOOD. I was craving for pan de sal here in Canada so I made my first. My husband tried it out and he won’t stop eating! We almost finished it in one day! That’s how good it was.
I have one question though, despite its goodness, is there any flour I can use for a substitute for all purpose flour? Can I use wheat flour and/or white stone ground flour? My family is a bit health conscious and would like to eat this frequently without having to worry about heath too much. Thank you for the recipe!
Hi Roo,
I am glad you and your husband loved the pan de sal 🙂 I have not tried wheat flour nor white stone flour to make pan de sal but I know some people who use wheat flour and the pan de sal taste good too. Hope these help!
Hello there may I ask what type of bread machine do you use? Thank you.
I use Black & Decker.
I can highly recommend the recipe and cooking procedure.
My wife has tried to make Pan de Sal on a number occasions using other recipes with little success but with this recipe the results were outstanding.
Thanks to you! My first try went out well. I followed the recipe “with bread maker” and i let it rise for 5 hours. I baked it the following morning. It’s so crispy and tasty. My colleagues loved it.
All the best! – MG
That’s awesome! Glad your colleagues loved it 🙂
It’s a delight! By searching a pandesal recipe, I found many, but I was so lucky to get yours, easy and simple. I success it from the first time, my kids like it so much. Thank you Liza for sharing.
Hi there, thanks for posting your recipe. Just wanted to find out how to divide the dough lol Kasi one of the recipes I tried it required to roll the dough into a log. lol e it bounces back 😀
But your recipe doesnt require this process. So pano yun? Hihiwain lang?
Yes, just cut the dough into 24 pieces and shape into balls. Hope you get to try it!
Can i use bread flour instead?
Yes, you can use bread flour.
Hi Liz! What kind of bread machine did you use? Thanks!
Hi Dessa,
I am using a Black & Decker bread machine and I have been making pan de sal with it since 1995.
This recipe is great and tastes even better than the store-bought version! I will definitely make this again.
So happy you liked it Taylor!
Hi Ms. Liza,
What happen if my dough not rise in a double size and they became plot instead of paumbok.
Hi, Sorry to hear that it did not turn out well. The only thing I can think of is maybe the yeast did not work properly. Maybe you can try with brand new yeast?
Hi Liza should the butter be softened or melted?
Hi Bing,
The butter does not have to be softened nor melted when you are using it in a bread machine. I always use the butter directly from the fridge. Hope this helps!
Hi Liza,
I have been using a recipe from another website but cannot get the taste I have been looking for. So when I saw your recipe I tried it but cut the ingredients into half as my bread machine size is for a 1-loaf bread. The dough came out a bit dry. I let it rise for 4 hours and baked it as per your recipe. After 20 minutes baking at 225, I raised the oven temperature to 325. My oven took a couple of minutes to reach the 325 and I noticed that the top of bread came out too dark. However, the inside is soft and taste is perfect.
My comments: first of all, is it ok to cut the ingredients into half? Secondly, after baking for 20 minutes, do I need to take out the pan from the oven, increase the oven temperature and then put back the pan and bake for another 10 minutes?
Hi Rebecca,
Baking requires exact measurement so when you divide or double a baking recipe, you may not get the desired result. Here are my insights based on what I have read from your experience:
1. If your dough came out dry, try reducing the amount of flour
2. The pan de sal stays in the oven when you increase the temperature to 325 degree F.
3. Make sure to bake the pan de sal in the middle of the oven.
4. Baking time also depends on the oven so take a peak every couple of minutes after you increase the oven temperature and remove the pan de sal when it’s nice and brown.
Hope these help!
Very easy to make and came out excellent! Used it for supper one night and the rest for french toast casserole. Will definitely make again. Really love the texture!
Hi Liza, thank you so much for sharing the pandesal recipe. i made pandesal several times but always a failure. I tried your recipe today and the result was amazing, LOVE LOVE LOVE IT!!!!!!.
You’re welcome! I’m so glad you liked it!
Hi Lisa – I tried making your pan de sal today using a mixer and active dry yeast. Dough did not rise at all. I read some of your suggestions above like making sure milk is lukewarm. I used the manual way kc wala akong bread machine. Only thing I could think of is the order ingredients were mixed together. I dissolved the yeast on warm water in a small bowl. Mixed the egg/mild mixture in the mixer on low setting. I then added the yeast to that and then started adding my flour. Would that have made a difference?
Hi Lara, The procedure of making pan de sal is different if you are not using the bread machine. Here is the link, if you did not see it: https://salu-salo.com/making-pan-de-sal-old-fashioned-way-without-bread-machine/. Your procedure looks okay to me for the most part. But, one reason why the dough did not rise could be that the yeast is old. Hope this helps 🙂
I’ve found that the shelf life of yeast can be extended considerably by storing it in an air-tight jar in the refrigerator.
Yes, I store the yeast in the fridge.
Hi Liza,
Happy to find your Pan de Sal recipe and this just might be the one my kids & I are looking for. Have tried many others but did not qualify for that “tastes like that one back home” quality. I do not have a bread machine, is there any way I can achieve same quality bread by doing this manually? Nice blog!…..and thanks for any reply. Hoping to be able to tell you of my success once I’ve tried this.
OMG Liza, finally baked my 1st successful Pan de Sal (thanks for your recipe)! My kids loved them too. We are going to bake more for the family this weekend. Thank you soooo much for sharing your recipe with us. =)
Yay! I feel happy every time I hear a success story with the recipe. I am also glad that your kids loved them. My kids grew up eating my pan de sal and they never get tired of it. They still eat it with ham, cheese, peanut butter or butter with sugar. Thanks for writing and enjoy the pan de sal 🙂
Here’s the link to the manual way of making pan de sal: https://salu-salo.com/making-pan-de-sal-old-fashioned-way-without-bread-machine-1/ Enjoy and thanks for stopping by!
Hello po.. Can i just use water instead of fresh milk? May magbabago po sa lasa?
Hi Michelle,
I have always use milk to make pandesal so I do not know how it will turn out if water is used.
hi liza,
i want to try your pandesal recipe using a bread machine. may i know what kind of bread machine you used? is it the same as an electric bread maker? looking forward to your reply. thanks so much =)
Hi Mia,
I use Black and Decker bread machine and yes, it’s the same as an electric bread maker.
Hello Lisa,
I read your comment “the trick is to let rise for many hours after you form it into a roll”
What stage of the rising is this? The first rise right after all the ingredients are all mixed together or when they are cut into small pieces and rolled in bread crumbs already. Please clarify this for me. I have tried making it several times already and after a day it is very hard and compact. Please advise me what I am doing wrong.
Thank you,
Carmelita
Hi Carmelita,
I was talking about the part when I form the dough into smaller pieces and roll them in breadcrumbs. I then let them rise for so many hours until the pieces are touching each other. If you are getting hard and compact pandesal the next day, try using less than 4 cups of flour. Based on my experience, a sticky dough ( not too sticky) plus time to rise in a warm and humid environment will yield a softer and lighter pandesal. Hope these help 🙂
In the narrative, it speaks of letting the dough rise for 5 hours. Yet in the recipe the instructions say to let the dough rise at least one hour. Can you elaborate regarding the difference? I am very anxious to make your recipe. Many thanks for your help!!
Hi Gail,
The instructions specified to let the shaped dough rise for at least one hour or double in size, depending on the room temperature. I let mine rise for 5 hours because it yields lighter and softer buns. Hope this helps.
Hi,
I have tried the recipe but my pandesal came out hard.. I followd evry step except the oven temp. I used bakery oven and its temp is not accurate.. So I started the temp low and wait til the bread became brown.. It looked fine but it was hard.. Dapat bang biglain ko ang luto s pandesal s high temp? Panu b mssbi n over cooked?
Hi Anton,
Based on my experience, there are several reasons why pandesal might come out hard;
1. Too much flour was use- try using less than 4 cups and gradually add more as you knead. From my experience, it is better to have a sticky dough ( not wet). It usually produces soft pandesal.
2. Give the dough more time to rise
3. Bake the pandesal at low temperature until they double in size and then increase the oven temperature and bake them until they are brown. it might just take 5 minutes, depends on your oven, just watch pandesal closely.
Hope these help 🙂
Hi! I really want to try this and in the process of buying a bread machine. What brand do you recommend and what is the bread machine that you have.. Thank you
Hi Sherry,
I have a Black & Decker 2 lb bread machine and I have been using it since 1996.
Thank you 🙂
I was wondering what brand of bread machine yeast and bread crumbs you use. Can’t seem to find them in local grocery store.
Hi Josh,
I usually use ‘Bakipan’ or ‘Red Star’ brand for my bread machine yeast. I live in Vancouver, Canada and so I buy my bread crumbs from the bakery section of Safeway, Save-on Foods or Superstore. Sometimes you can also get them in any local bakery shops. Hope these help 🙂
Hi Liza,
I’m so lucky to come across your site as i am starving for pandesal here in land down under. Would love to try your recipe soon and invest on this breadmaker machine. Just want to ask the kind of milk you used and is lukewarm really necessary? Have you tried fresh milk? I’m excited to try this! 🙂
Cheers!
Hi Mitch,
I always use fresh milk, 2%, skim or even homogeneous, whichever you prefer. You don’t have to warm it up but I find it produces better pandesal if you do. Take care and thanks for stopping by!
Great recipe! Weve been baking our own pan de sal version for at least 5 years. The ones that we used to bake hardens up after it cools off. I tried your recipe without my wife’s knowledge. When my kids tried it, everybody was floored on how soft and yummy it was… needless to say, we are dropping our previous recipe and adopting yours as our family’s official pan de sal recipe. Thank you!
You’re welcome Marco! Glad your kids liked it 🙂
Hi! I will try your recipe tom. I’m in search for a good pandesal recipe. Just wondering though if the pandesal stays soft even after a few days.? Other recipes i tried, the bread becomes so hard the day after.
Hi,
If you let the dough rise for a long period of time, it will yield pandesal that stays soft even after a few days. And make sure don’t use too much flour when you are kneading the dough; a sticky (not wet) dough will also produce a softer pandesal. Hope these help and thanks for stopping by!
how about if i dont use egg ? will it make difference ?
Hi Fraulein,
You may omit the egg but the texture of the pandesal might be different. It might not be as soft as the one with the egg.
okay 🙂 thanks,
Hi Liza,
I let the dough rise overnight, or maybe the dough was still soft? I knead for 15 minutes. Anyway it is just minor, I will try again until perfected and I will let you know again. Thank you once again for your wonderful recipe..
Best regards
tony
Hi Liza, Thank you for sharing this step by step procedure and it works, and the pandesal is soft and delicious, pero bakit ang pag rise nya ay hindi paumbok kundi palapad, any additional clue? Thank you very much and God Bless!
Tony
Hi Tony,
Glad that you were able to try my pandesal recipe 🙂 I don’t know why the dough did not rise “paumbok”. My only guess is either you let the dough rise too long or did not knead the dough enough. Hope this help 🙂
Hello, I want to ask if it’s ok to use 1 pack of active dried yeast ( valid for 500 gramms of flour)?
Hi,
It depends on how many teaspoons of yeast in the pack. If it is good for 500 grams of flour, then it should be okay.
Ms. Liza where did you buy the bread machine yeast? what is the difference of using all purpose flour instead of bread flour on the bread making machine?
My aunt is sending me a bread making machine. I would love to make her these.
Hi Mariz,
I am pretty sure you can find bread machine yeast in most supermarkets. I bought mine at Safeway. As for which flour to use, I normally use all purpose flour to make pandesal. But today I used bread flour and I did not notice any significant difference. It tastes the same and has a similar texture. Thanks for writing and enjoy your bread machine 🙂
Shared your recipe with friends, relatives and they all love the Pandesal. So easy to follow and the bread always comes out perfect. Thank you.
You’re welcome Len! Glad everyone likes it and thank you for writing 🙂
Hi Liza. Just thought I’d let you know that I also made Spanish bread using your pan de sal recipe. For the filling, I mixed 1/2 cup softened butter, 3/4 cup (or less) brown sugar, 1/2 tsp vanilla extract until well incorporated. Didn’t have breadcrumbs so I left it out. The dough yielded 32 rolls (approx. 30 grams each). Can’t thank you enough for the superb bread recipe.
Sounds yummy! I will definitely try it. Thanks Michelle 🙂
Tried and followed your recipe to the letter (with the exception of using an egg replacer) and a batch of pan de sal is just fresh out of the oven. And I am blown away (so are my parents)! The rolls came out crisp on the outside and soft on the inside. I’ve tried a few other recipes and none of them came quite as close to the pan de sal I grew up eating. The aroma, taste and mouth feel of these rolls took me right back to my childhood. Thanks for sharing and ending my quest for the best pan de sal recipe.
Awwwww! Thanks for the heartwarming comment and for taking the time to write. It made my day 🙂
i follow ur recipe, but it didnt turn right, i dont know why, it didnt rise as much also hard and dry. do u think i put too much flour when i was kneading when i also kneading i keep putting d remaining flour, but didnt use everything.
Hi Liza,
There are many factors why the pandesal turned hard and dry. Here are few suggestions based on my experience;
1. Make sure the milk is lukewarm
2. Try using less flour, start with 4 1/4 cups of flour and then gradually add more when kneading.From my experience, it is better to have a sticky dough (but not too sticky). It usually produces soft pandesal.
3. Lastly,give the dough more time to rise ( after it has been shaped into balls). In winter time, I usually make it in the morning and let it rise the whole afternoon. Or if you want fresh pandesal for breakfast, make it at night, let it rise overnight and bake it the next morning.
Hope these help 🙂
Do you have to refrigerate the dough if I plan to bake it the next morning?
Hi,
You have to leave the shaped dough on the counter covered with dish towel overnight if you are planning to bake them the next morning. This will give the dough more time to rise and will give you softer pandesal.
HI Liz, is this mean leaving the dough inside the refrigerator overnight?
If I want the dough to rise overnight, I usually cover it with a damp dish towel and leave it out on the counter.
Hi Liza,
I already made pandesal using your recipe and it is very succesful thank you so much for sharing your knowledge to everyone. More power and God bless you.
Thanks Riza! Glad you were able to make the pandesal. My family still prefers mine over the store bought ones, especially when they are freshly baked. They like eating it with melted butter and sprinkled with sugar 🙂
If I use bread machine can I use the active dry yeast instead of bread machine yeast?
Hi Rizza,
I always use bread machine yeast so I don’t know if active dry yeast will work.
yes it will work but put the salt on the other side of your dry mixture because it will interrupt the active dry yeast activity
okay lang ba kahit wlang bread crumbs `?
Okay lang, but it is better to coat the dough with breadcrumbs because it gives the pandesal a distinct flavor and aroma.
This could be easily made by hand, correct? I don’t have a bread machine but really want to try this recipe.
Hi Sarah, I added a manual way of making pan de sal. Hope it helps 🙂
HI Liza can I use my stand mixer mixing this?
Hi Leny,
I just recently bought a stand mixer and I love it! I haven’t use it for making pandesal but I am pretty sure you can use it for mixing the dough.
Enjoy and have a good weekend 🙂